RACE DDU
the braking coach, as small as it gets
The base bar
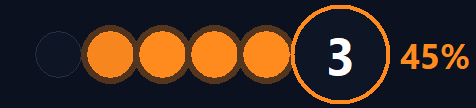
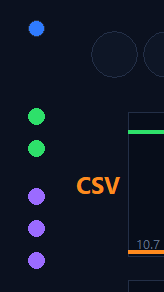
RACE starts as a single tiny bar: 5 countdown dots on the left, the Push & Lift
button on the right. It works exactly like the countdown described in the
colour language above — 5 lights, 3 seconds of lead time, the
colour of the upcoming corner arriving before you get there. The button itself lights
up with telemetry and dims while it's waiting for iRacing to connect.
Move it by dragging anywhere on the bar's body. Resize it by dragging any
corner or edge — width and height are completely independent, so you can stretch it
into a long thin strip, a small square badge, or anything in between; there's no fixed
proportion to fight against. Right-click opens the menu for everything else.
Docked screens
From the right-click menu, Screens → lets you attach up to four extra panels —
Top, Bottom, Left, Right — around the base bar. Each one follows the bar when you move
it, and hides completely when switched off, so you only ever see what you've turned on.
Every docked screen is a canvas you build yourself: turn on Edit mode (menu or
the E key) and each cell shows small buttons to split it in two — vertically or
horizontally — open its settings, or delete it. Click the body of an empty cell to pick
what it shows from the full widget catalogue below. You can also grab the screen's
outer edge — the side that doesn't touch the bar — and drag it to change how
thick that whole screen is.
The widget catalogue
Every cell on every docked screen — in RACE or in ADVANCE, it's the same 101-widget
catalogue — can show any of these, in 9 categories:
CSV-DDU · PREDICTIONS FROM YOUR REFERENCE
BRAKE ALERT / BRAKE ALERT 2The full 5-point countdown, or the compact 3·2·1·BRAKE version, as a standalone widget you can place anywhere.
RALLYCalls the next corner rally-style — how tight it bends, and the gear to take it in.
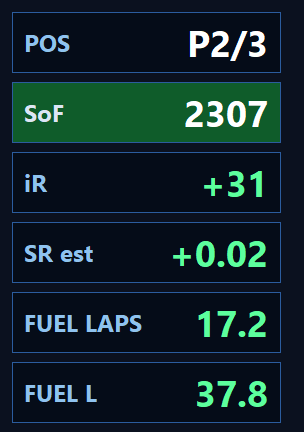
iR GAIN / SR GAINThe iRating you're gaining or losing right now from the live standings, and an estimate of this session's Safety Rating change.
REF LAPConfirms which reference lap is loaded and whether it matches this track.
STINT AVG / RACE AVGYour average lap since the last pit stop, or since the start of the race.
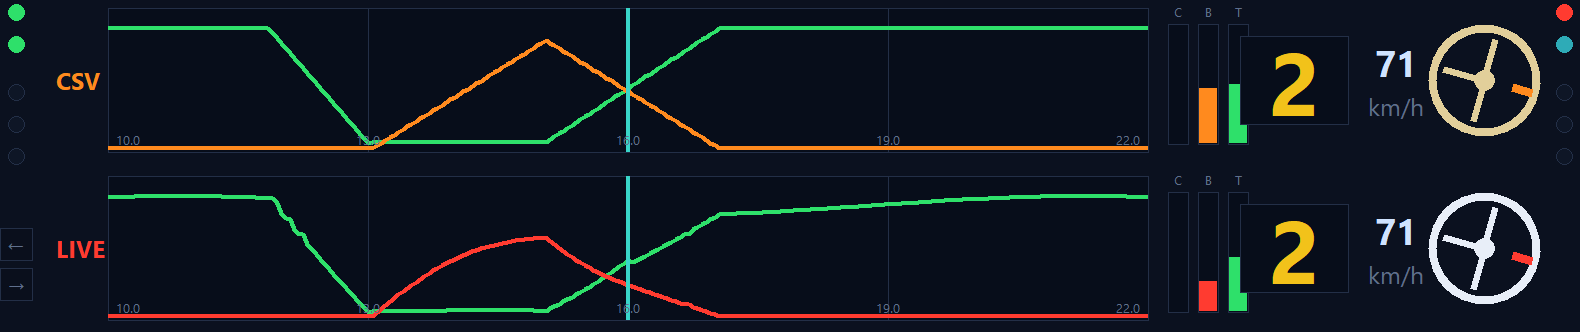
TELEMETRY VS CSV / COACH / PEDALS VS CSVYour live speed and pedals traced against the reference, or a corner-by-corner coaching readout of where you gain or lose against it.
BRAKE % NEXT / BRAKE METERS / PUSH WORDThe predicted brake pressure for the next corner, the distance to the braking point in metres, or the word PUSH/BRAKE/LIFT itself as a widget.
FUEL-CORR PACE / STINT DEG / PIT WINDOW / UNDERCUT-OVERCUT / LAP TYPEYour pace corrected for fuel weight, whether it's dropping over the stint, whether you should pit now, undercut/overcut risk with the car ahead, and whether this lap is a push or a save lap.
PL RELATIVES
STANDINGS / STANDINGS HORIZONTALClass standings — position, gap and lap times — as a vertical list or a horizontal strip.
RELATIVE BASIC / SPRINT / POSITION / COMPACT / FULLNearby cars in five densities, from just name and iRating up to iR, license, times, pace and pit stops all at once.
RACE
FLAGS / DIGIFLAGThe current flag state, in the colour that flag actually is, or as a solid digital panel.
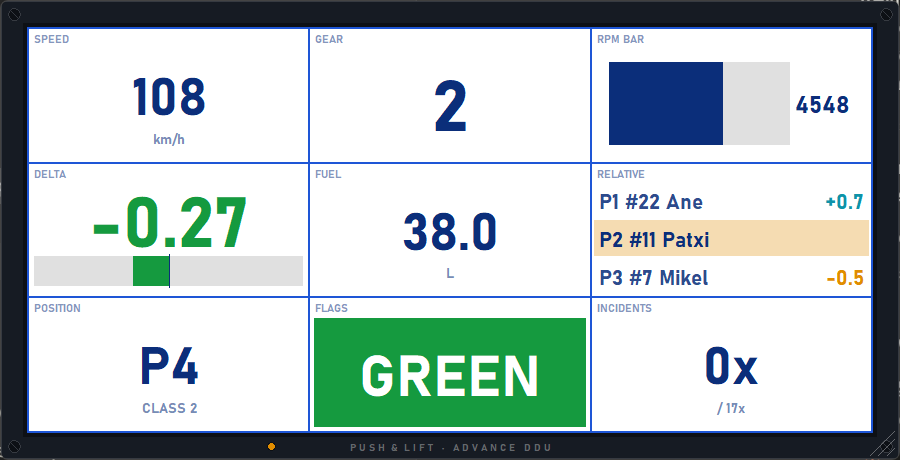
POSITION / INCIDENTSYour overall or in-class position, and your incident count against the session limit.
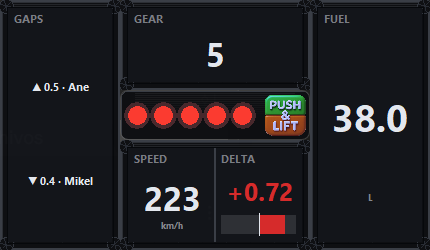
GAPS / RADAR / RADAR BARS / BLIND SPOT / OVERTAKE ALERT / HEAD TO HEADTime to the cars ahead and behind, proximity radar, a blind-spot alert, a ping when you gain or lose a position, and a dedicated 1-on-1 duel readout against any rival.
SOF · iRThe strength of field for this session, from the live standings.
DELTA / DELTA BAR / DELTA GRAPH / SPEED GRAPHLive gap to your best lap — as a number, a bar, or a running graph — plus a speed trace over time.
LAPS / LAST LAP / BEST LAP / SESSION / LAP % / CLOCK / CURRENT LAPLap counter, last and best lap, session time left, lap progress, local time, and your current lap ticking live.
LAPTIME LOG / SPREAD / GRAPHEvery lap this session as a list, your best-to-worst spread, or a full bar chart.
RACE SCHEDULE / PIT HELPER / TRACK MAPThe event's session sequence, a pit-lane limiter/speed assistant, and a track map drawn live as you drive.
FUEL AND TIRES
FUEL / FUEL BAR / FUEL LAPS / FUEL CALC / FUEL TARGETLitres left, a filling bar, laps of fuel remaining, a calculator for whether you'll make it, and your target consumption per lap.
TYRES / TYRES 3-ZONE / TYRE WEAR / WEAR SYMMETRY / PIT STRATEGYTyre temperatures overall or in 3 zones per wheel, remaining tread, left/right wear balance, and the pressures scheduled for your next stop.
CLIMA
WEATHER / RAIN RISK / TRACK TEMP / AIR TEMP / HUMIDITY / WIND / TRACK EVOLUTIONEvery environmental reading on its own or combined, plus a rain-risk estimate and how track temperature is trending over the session.
MIXED CAR INPUTS
PEDAL GRAPH / DRIVER INPUTS / PEDALS / G FORCE / COACHE / STEER SMOOTHThrottle and brake traced over time (optionally against a loaded CSV), all three pedals as bars, a live G-diagram, an all-in-one braking/pedals/under-oversteer coach, and steering smoothness.
SINGLE CAR INPUTS
THROTTLE / BRAKE / CLUTCH / WHEEL / LAT G / LONG GAny single pedal on its own, your steering wheel at its real angle, and lateral/longitudinal G separately.
CAR INFO
SPEED / SPEED BAR / GEARYour current speed as a big number or a filling bar, and the gear currently engaged — N and R included.
RPM / RPM BAR / SHIFT LEDSEngine revs as a number, a bar, or a row of shift lights that build up to your redline.
BRAKE BIAS / BRAKE BALANCE / ABS · TC / LOCKUPFront/rear brake balance (set or actually measured at the lines), traction-control/ABS indicators, and wheel-lockup alerts.
ENGINE / VOLTS / FLUIDSWater and oil temperature, battery voltage, and remaining oil/water levels.
CAR ATTITUDEA bubble level for the car's pitch and roll.
OTHERS
TRACK / WELCOMECircuit name and session type, or a welcome card explaining the app and how the screens work.
NOTES / LOGOFree text for setup notes or a message to your stream, or the animated PUSH & LIFT logo.
Your reference lap
Menu → Reference: load a clean single-lap CSV — from Garage 61 or any tool that exports
that format — record a live lap of your own with ● REC, or use the built-in demo
to try everything without a reference at all. Push & Lift checks it's the right
track and warns you if it isn't.
Fit & settings
Size, opacity, always-on-top, a borderless overlay mode for pinning inside Meta Quest
Link or OpenKneeboard, and a titled-window fallback for other VR setups. Every setting
is remembered between sessions.
Read the full RACE DDU manual →